So You're Going to Build on Ocean Liner?
JOHN H. SLATE IS a New York lawyer who has not yet finished his ocean liner, being preoccupied with work on his book, THE DAY THEY BUILT ROME.
Every summer one (or more) of my friends goes to Europe, sometimes by air, sometimes by sea. Last winter a few of us met at a dinner party, and the conversation turned to the high cost of travel. “Why not,” somebody said, “build our own airplane or ocean liner and save money?” We all agreed that something should be done, and that on the whole a liner was quite practical since it could be stored in the water when not in use.
Well, to make a long story short, we haven’t got the thing done yet, but we’ve learned a lot, and I think our experience will be helpful to anyone who would like to have his own ocean liner.
How to Build an Ocean Liner
This breaks down into three main steps, which should be taken in the order indicated:
1. Making the plan
2. Getting the materials
3. Building the liner
Making the plan is quite easy, although we found that it requires a surprisingly large amount of paper. So be sure to get lots of paper before you start, as well as some sharp pencils. Then draw the liner on the different sheets of paper, and when you start building, use the drawings as a guide. It is not necessary to make the drawings as large as the liner. Scale them down, but be careful to make a note showing how much larger the actual ship is to be.
Now, as to the materials. It is best to use top-grade, durable materials as you will want your liner to last for several seasons, and it should be built to stand wear. In general, the harder materials such as iron or steel are preferable to the lighter stuff. However, a good deal of tin or wood can be used around the corners and in places that don’t show too much. Avoid plastics, for they are brittle and will break when you bend them.
For a small liner you will need about 20,000 tons of material; for the medium size, about 25,000; and for the large size, about 30,000. When you order the material, instruct the store to ship it to a factory where they will make it up into the different shapes you will need, as shown by the plans. A good rule of thumb is to have about 70 percent of the material made up into plates (which form the hull of the ship), about 2 percent into rivets to hold the plates together, and the balance into machinery and fittings.
Where to Start
Before we get to the actual building, perhaps the most interesting part, let’s stop to think for a minute about where to start. This will save you trouble later on.
Many shipbuilders start at the bottom, with the keel, and work up to the top, or smokestack. This is all right, and is certainly more sensible than starting at the top. However, I prefer a front-to-back method. Now, don’t get mixed up and start at the back. Here’s why: if you put the bow on first, you can build backward until you feel it’s long enough, then simply attach the stern and you’re finished. However, if you start with the stern and build forward, you have to be very careful about where to put the bow. If you put it too far aft, the ship will be too short; too far forward, the rest of the hull won’t even reach the bow, and your liner will sink first crack out of the box. The point is to eliminate guesswork.
The Actual Construction
When all the parts get back from the shaping factory, you can begin the actual construction.
First, prop up the bow where you want it. Be sure to prop it up so that it points forward, near, but not actually in, some water. Next, rivet the side plates to either side of the bow, and attach the bottom plates to the bottom edges of the side plates. Do this on both sides to prevent leaks. Fasten the keel to the bottom of the bottom plates, and fasten the stern to the rear edges of the aftermost side and bottom plates.
Deck and Smokestack Go on Last
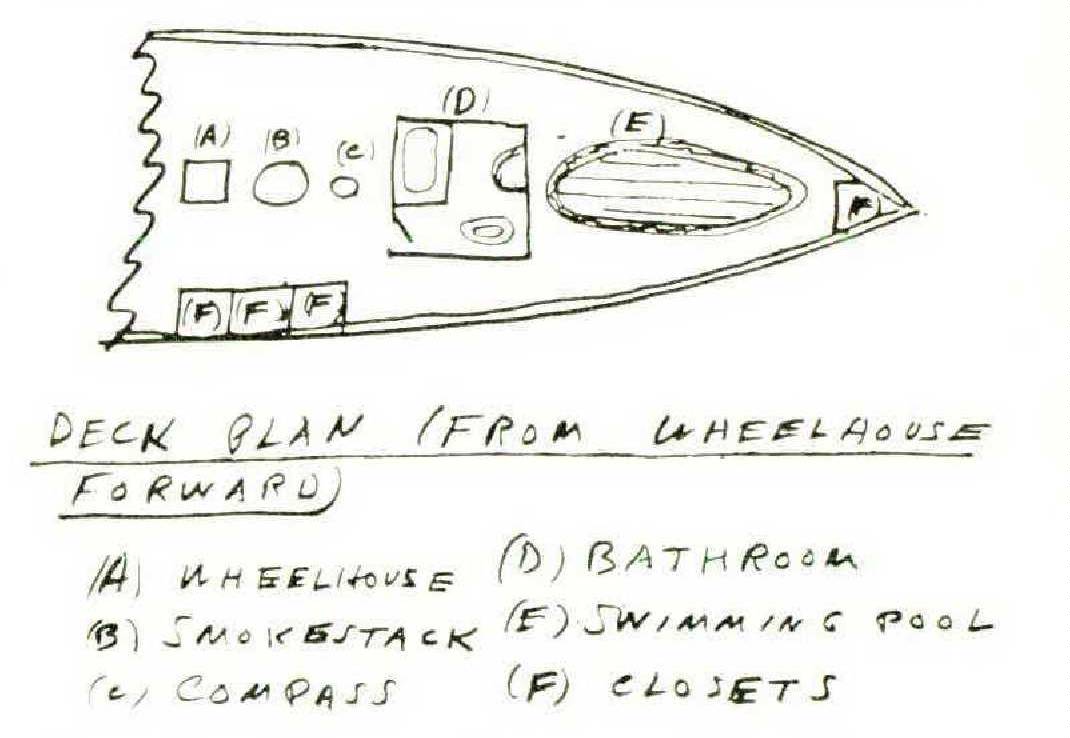
Before attaching the deck, install the machinery; then put the deck on top, and on top of that the wheelhouse, bathroom, swimming pool, smokestack, closets, and the compass. Place lifeboats along the rail, with plenty of good stout rope to lower them over the side in case of emergency. Paint the hull, smokestack, and all fittings. Use a large brush (ten to twelve inches) on the flat surfaces and a smaller one for the trim.
Ship’s Machinery and Fittings
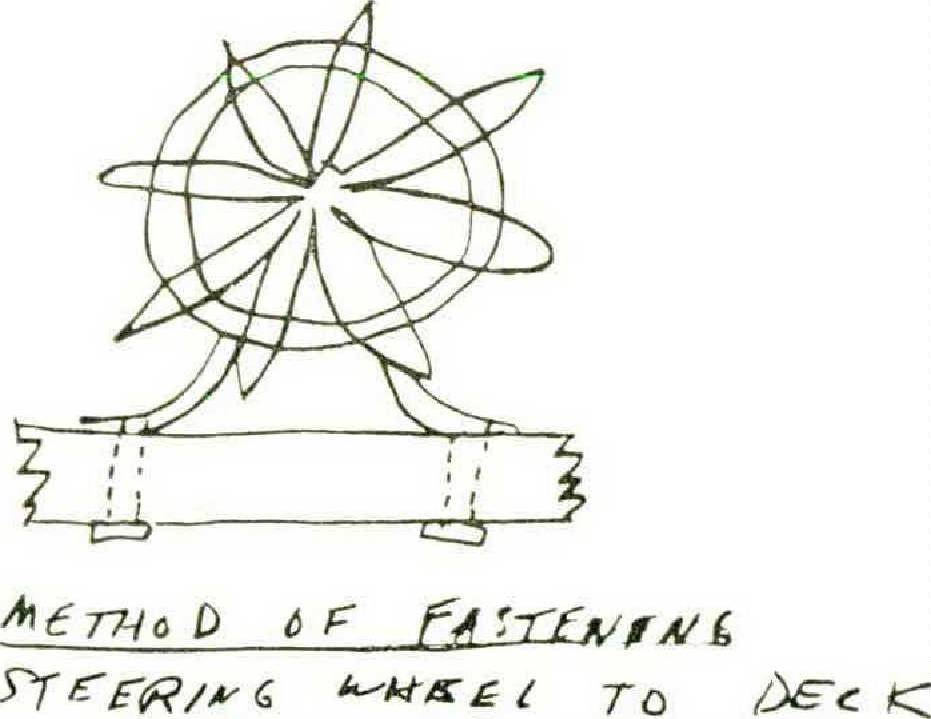
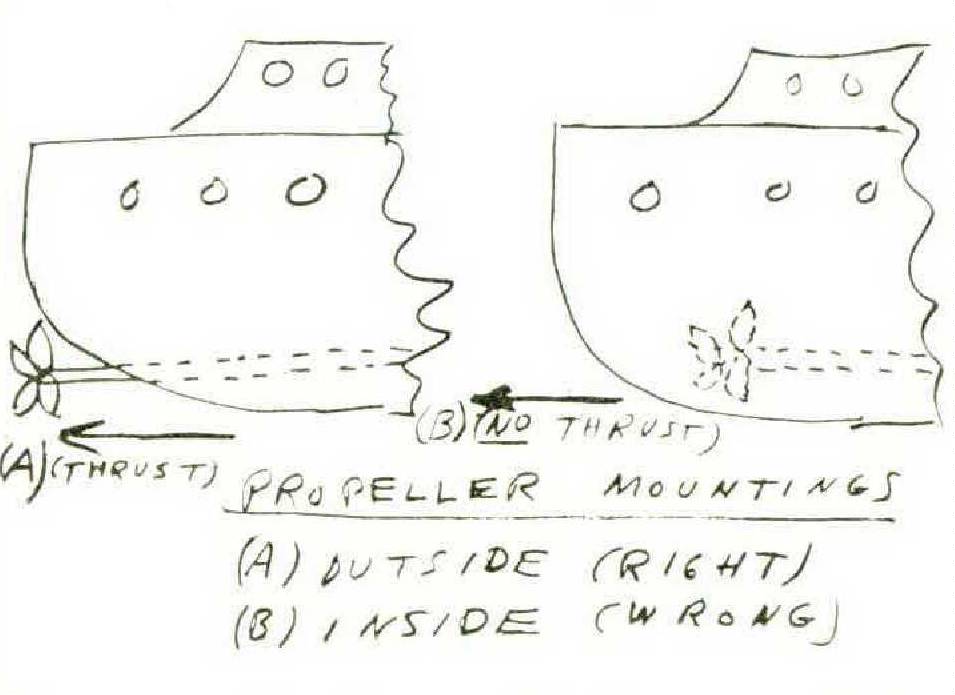
As I have said, the machinery goes under the deck. You will need an engine, a propeller, and a propeller shaft. I prefer a good big engine for this reason: you can go either slow or fast with a big engine, but with a small one you can only go slow. The propeller shaft should be long enough to connect the engine and the propeller, which should be placed outside, in the water. Remember, the so-called inside propeller, while less subject to corrosion, is not at all efficient. It will not actually propel, which it should do. Connect the steering wheel and the rudder. The steering wheel should also be fastened to the deck.
An automatic pilot (“Iron Mike”) is optional. I prefer to do without, as I have heard of cases where this has run the ship aground, perhaps owing to some defect. However, some reliable type of illuminating system is essential. There is nothing gloomier than groping about in a dark ocean liner at night. Ordinary Mazda bulbs (100 or 150 watts) will do.
Naming Tour Ship
The importance of properly naming your ocean liner cannot be exaggerated. On the whole, I prefer the British nomenclature, in which the name — for example, the Dauntless — suggests the ship’s personality, so to speak. However, if you use this system, be careful to avoid unfortunate choices such as the Surreptitious and the Yrrational. The names of individuals may also be used. This is an acceptable method if employed with good taste. Needless to say, subversive names should not be used at all. The Andrei Vishinsky, for example, would be entirely unsuitable; this vessel should simply be numbered. On the other hand, historical or patriotic names are beyond reproach: thus, Paul Revere’s Ride, or the Lincoln-Douglas Debates.
Well, that’s about all there is to it. Bon Voyage!